His Winnie the Pooh Bear
 The animated film Cars
 HOP - Israeli children Channel
 Thomas the Tank Engine
 Dora the Explorer
 His Computer and surfing in the Internet
 His light blue Crocs Shoes
 Meter - a character from the film Cars
 Ketchup - He plans to take this gigantic tomato cook it and make it into Ketchup
 His newly discovered Baby Blanket
Tuesday, February 20, 2007
Top 10 Things Daniel loves
Today I asked our 4-year old son Daniel what he loves most right now:
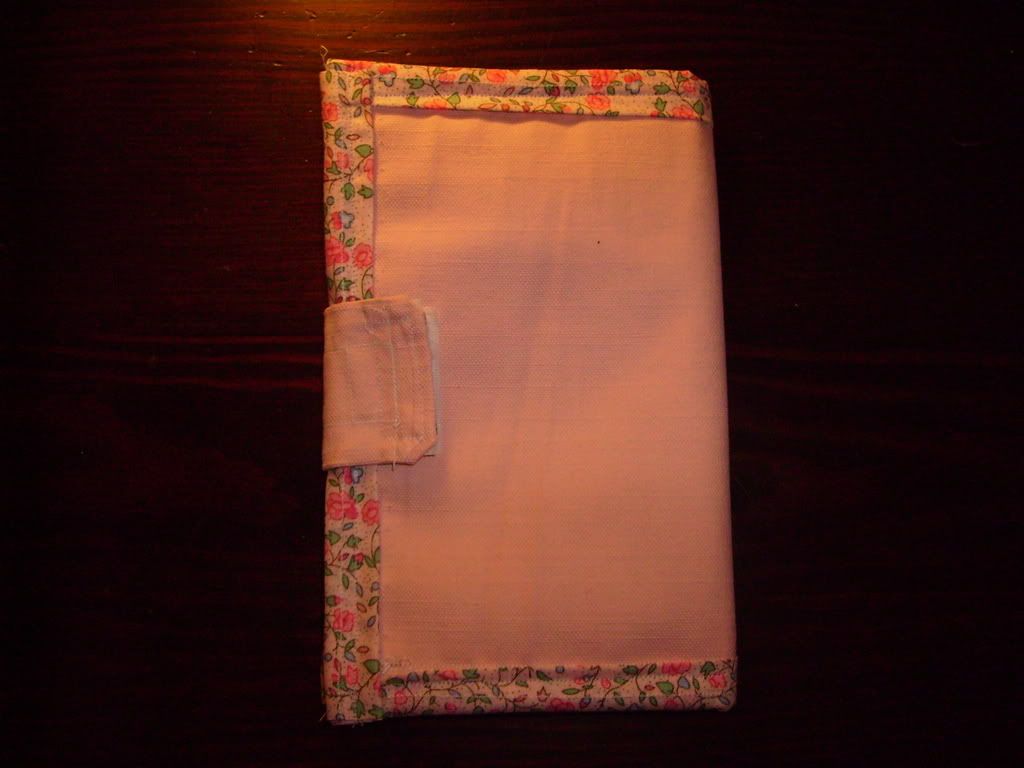
Another pretty wallet
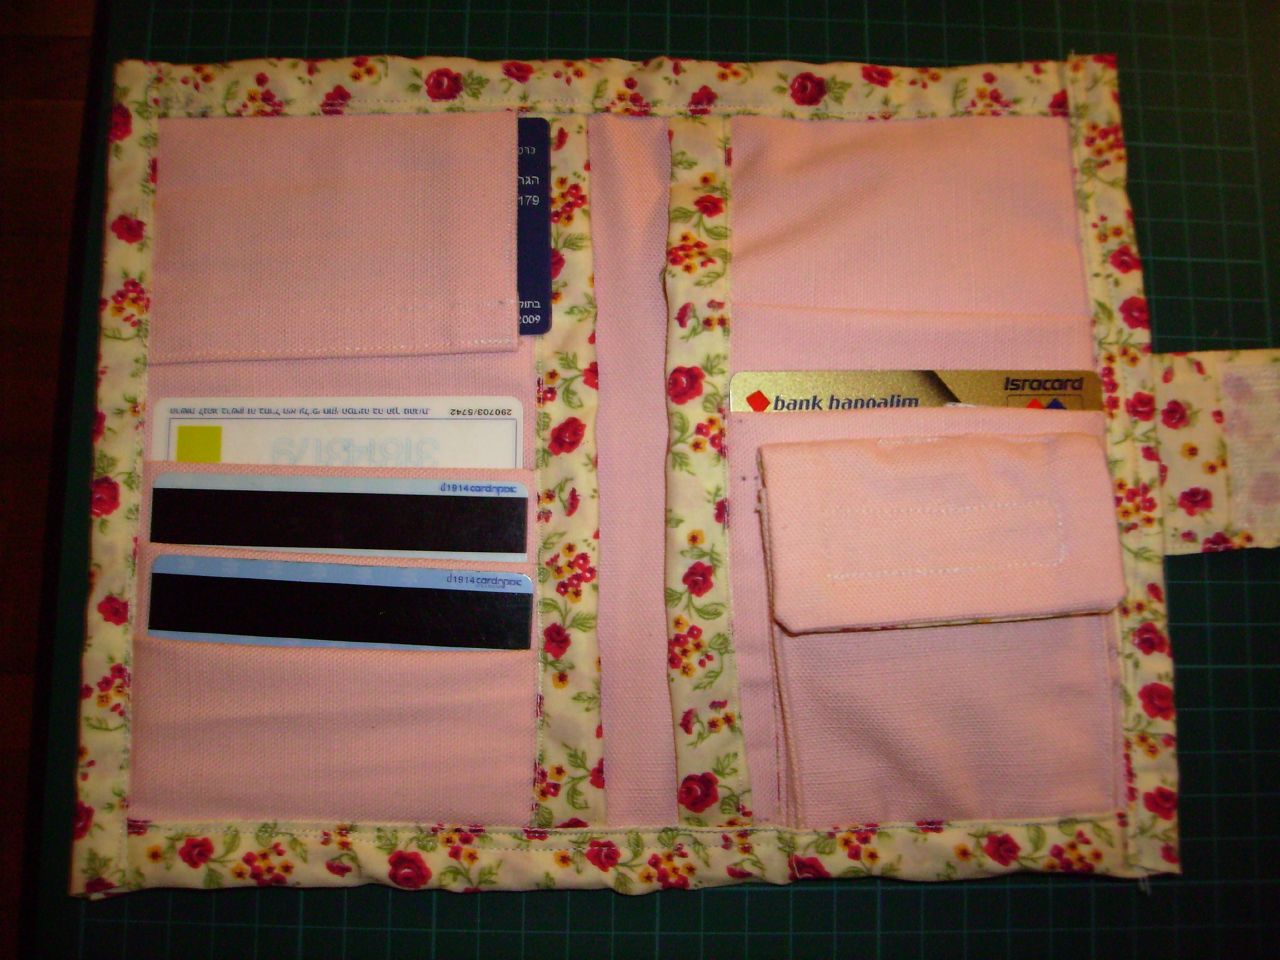
Yesterday I finished another long double folded wallet. The main cloth is again light pink cotton canvas. And the secondary is a yellowy - pinkish cotton fabric. When I did the binding with that fabric it all the time pulled together. I think the fabric was maybe too much starched (stiff) when I bought it.
I wanted to do the same wallet again so I can get better doing them:
This time I added a pleated coin compartment (more space).
The zipper I put in much nicer then last time.
I added another ID card compartment on the left top side.

Overall it came out quite nice, but I am still a little bit disappointed. For one thing I screwed up the binding again. (Last time it was not that bad!) I just have to remember to fold it over on the other side again - there is enough space! And the first zipper I sewed in on the wrong side (on the lining side). So this wallet is quite special: It has a zipper and underneath another zipper. - Which makes it quite bulky. But I didn't want to throw away that piece of cloth, so I just used it on the inside.
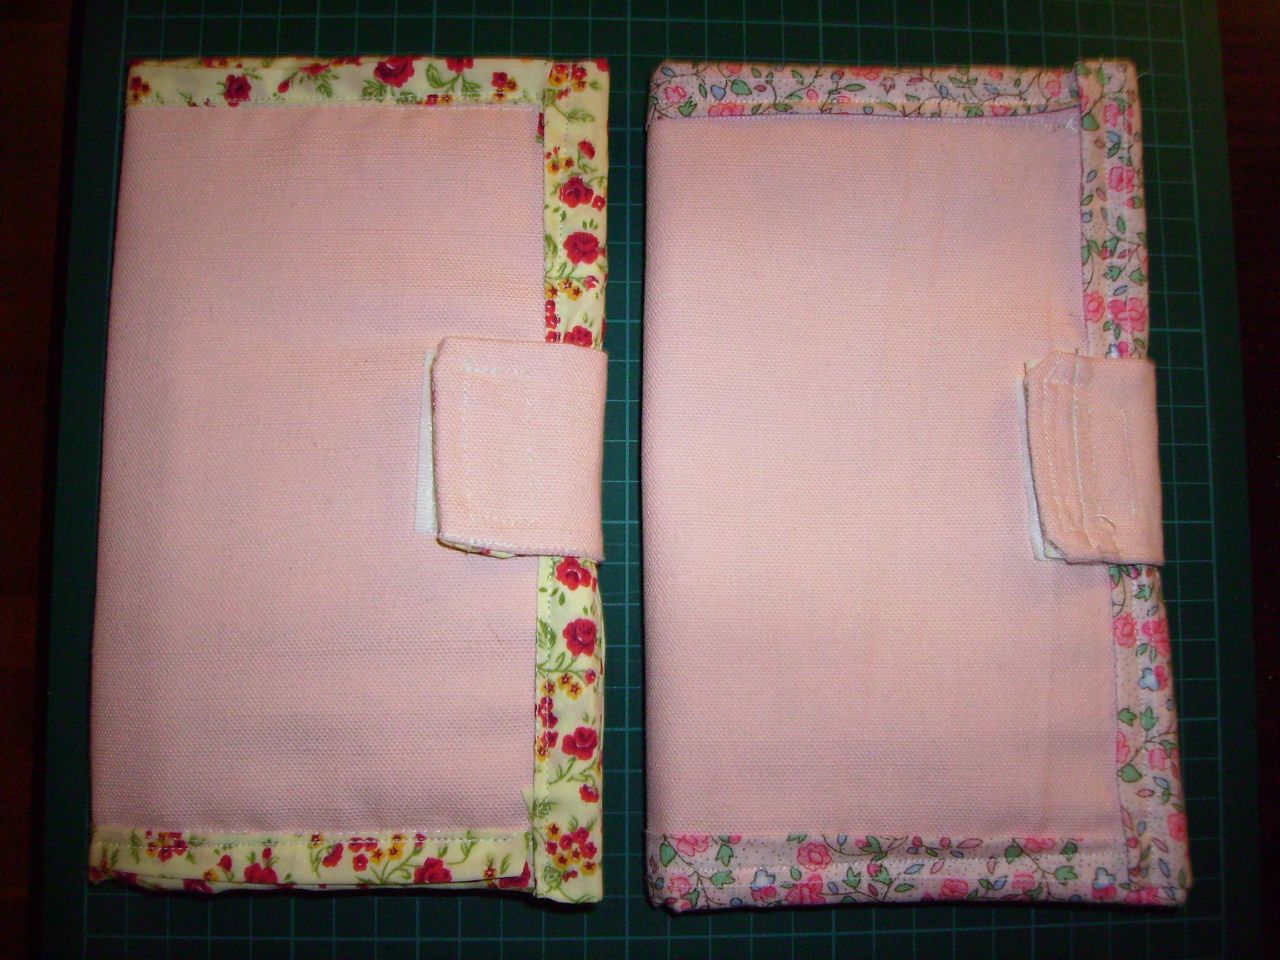 Here you see the first wallet I made about a week ago with "his new brother" ;-)
I am also quite tired of only having the pink strong canvas fabric. (You need strong fabrics for creating bags and wallets!) I am waiting already for an opportunity to go to Tel Aviv to buy some more sewing stuff and fabrics. Maybe next week...
Thursday, February 15, 2007
Camera Pouch
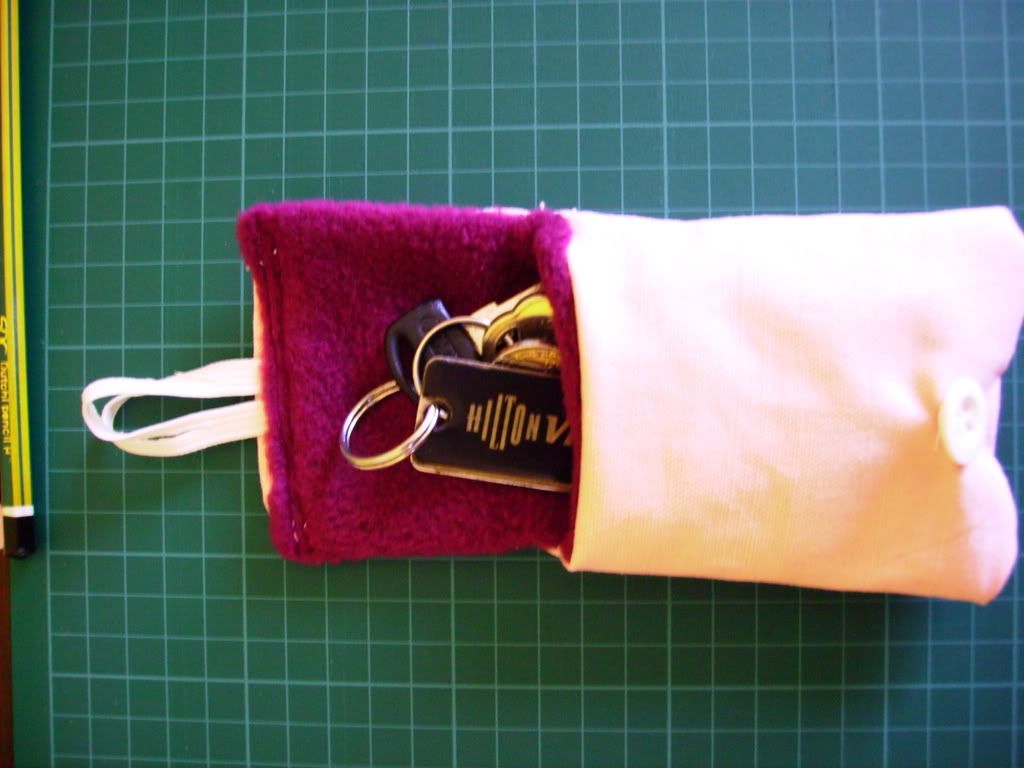
Again I found a nice idea in www.craftster.org : http://www.craftster.org/forum/index.php?topic=21586.0. As we just got a new camera I am going to make a cute pouch for it. (Not like those just uni colored black ones...)
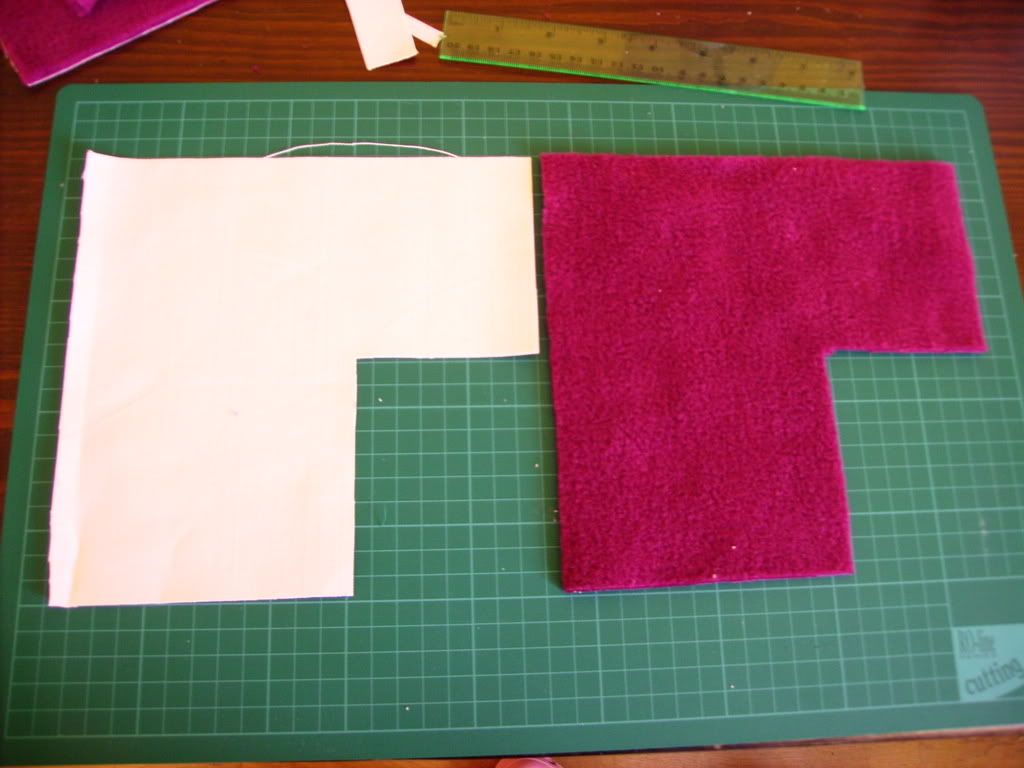
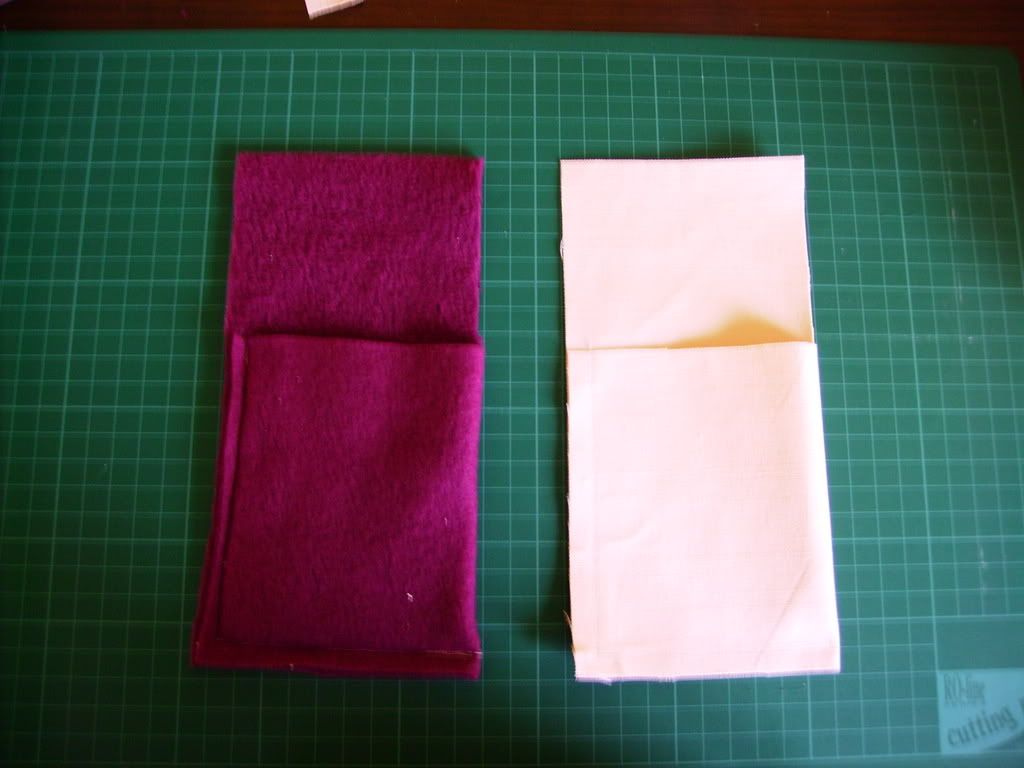
I started by measuring (kind of giftwrapping ...) it in fabric to get the dimensions. Mine were side1 8", side2 8", side3 4.5" and side4 3". If you start off with a 8x8" square fold it into half and cut in and decide on the flap length and cut in ---and off goes that square that you don't need for it.
The first one I made now didn't come out right. A) It was too small for the camera in the end, B) the lining fabric was too thick to go well with the outside one.
I think you have to make the ouside pouch slightly bigger so the inside one fits nicely inside. Maybe then you can go with a thicker fabric.
Wednesday, February 14, 2007
Zipper Pocket into Lining of Bag
I just reconstructed SewPixie's Tutorial. (It's here: http://www.craftster.org/forum/index.php?topic=11808.0 ) It's amazing how simple it is to put a zipper nicely into a fabric. The last two Zippers I put in didn't look that good because I didn't fully understand the instructions. So that's why I just took two pieces of scrap fabric and tried it out. So from now on I think I have mastered that subject.
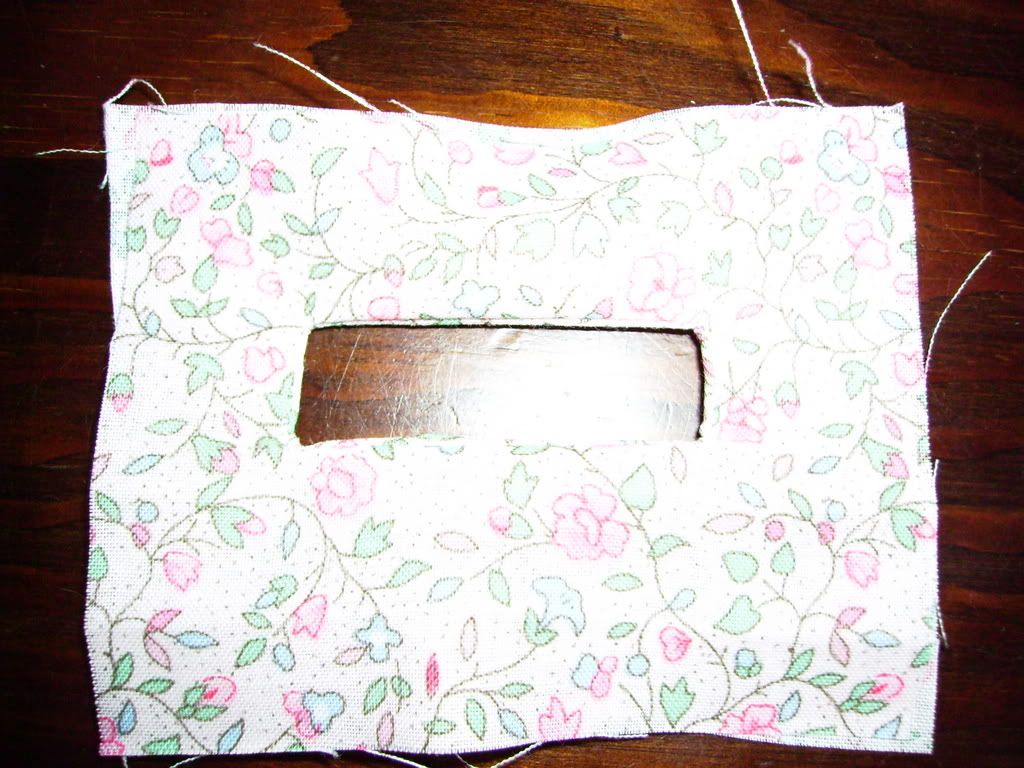
You start off by putting Lining and Fabric right sides together. Then you draw a rectangle as long as the zipper should be and the width between 1 - 1.5 cm (0.4" - 0.6" ). You draw a line through the center and on each side an arrow head. Now you sew along the rectangle. After that you cut out the line in the center plus the arrows. The last thing you have to do now is to pull the facing through the cut, iron and you're done!
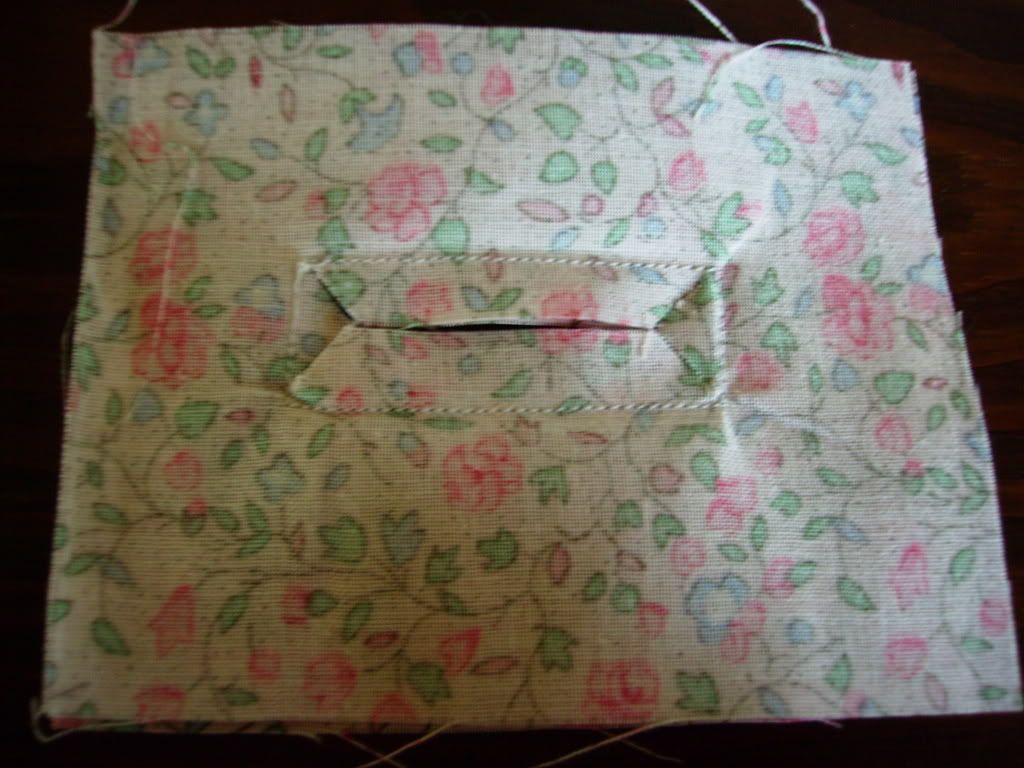 right sides together - sew around the rectangle
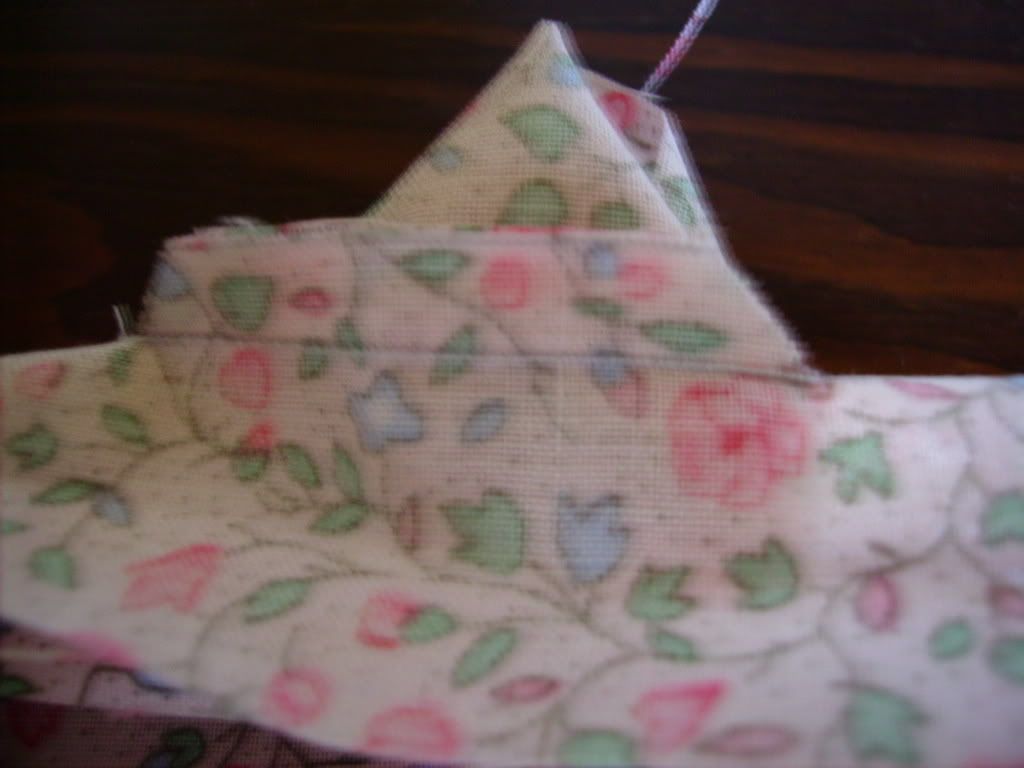 pull fabric through the cut
You can use this method for putting a pocket into a handbag or putting a coin pocket into a wallet.
Tuesday, February 13, 2007
Pink Wallet
 wallet open
I just finished in a few hours a nice cute pink wallet. Whenever you try something new it takes a long time but I am sure next time I do this same purse it goes much quicker. Again, I am quite proud of myself.
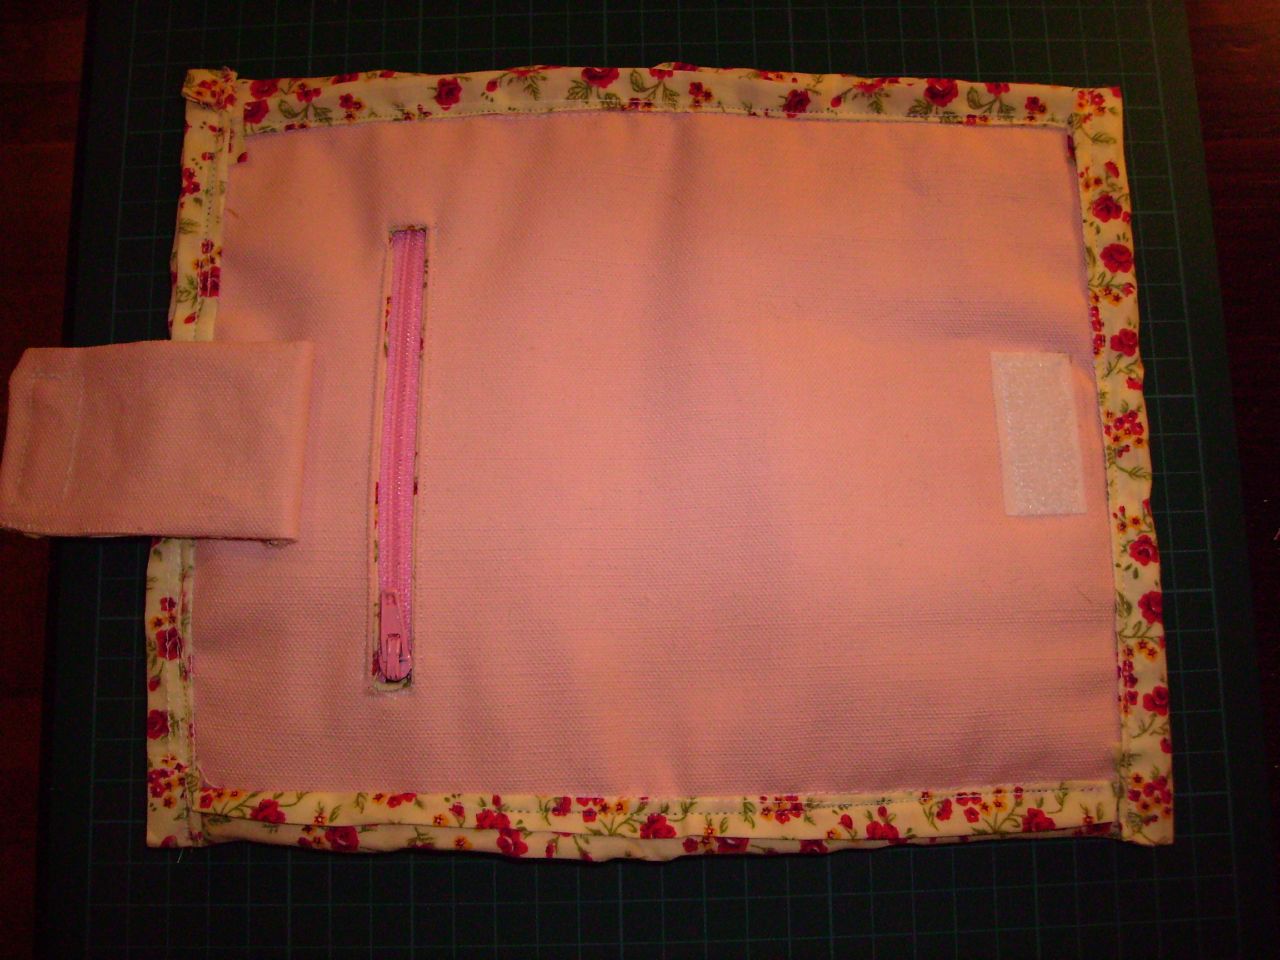
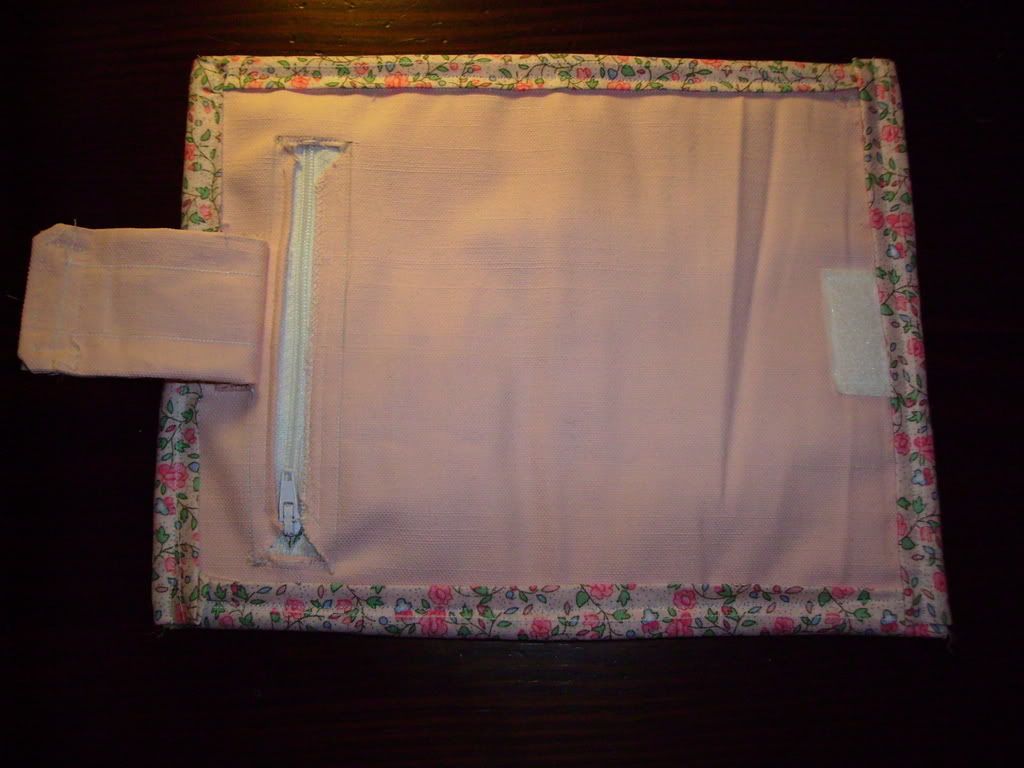 wallet from back side - with zipper pocket and closure strap
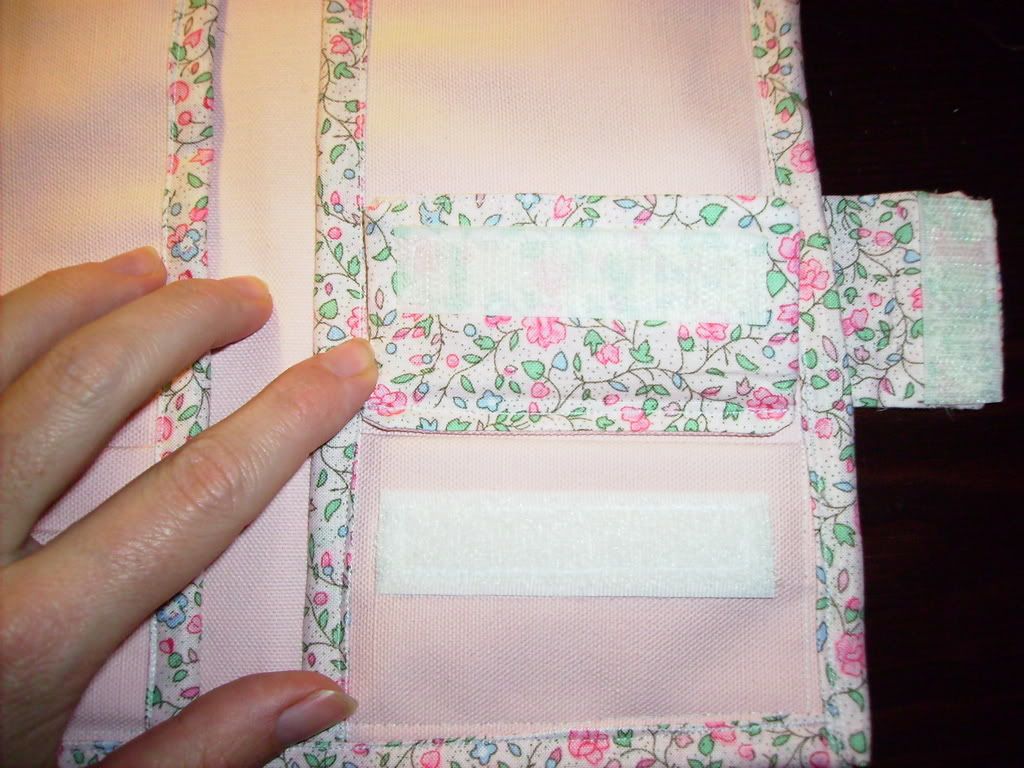
It has 3 card slots on the left side and one on the right. On the right side it has also a compartment that closes with Velcro for coins. On both sides you can put money bills (or use one of the two for a day planer). On the backside it has a zipper compartment for coins and other stuff.
The idea for this wallet I have from SewPixie and her nice tutorial on: http://www.craftster.org/ . The exact link is: http://www.craftster.org/forum/index.php?topic=16097.10 I just modified one of the left pocket card slots into the coin compartment.
The pink main fabric is strong cotton canvas and the binding/lining is regular quilting thinner cotton fabric.
Binding: Cut a long 3" strip of your lining:
3" total raw - fold in 0.5" and hem (so for marking sew down 1") on both sides of the strip. 0.5"Double - 0.5"Single - 0.5" Single - 0.5"Double.
Matching edges sew 0.5" (which takes 1.5" away on the one side, 1" from other so you stay with 0.5" for the fold) then turn over to other side so you get the right side facing you, fold 0.5" and bend it to enclose the casing and sew near the fold.
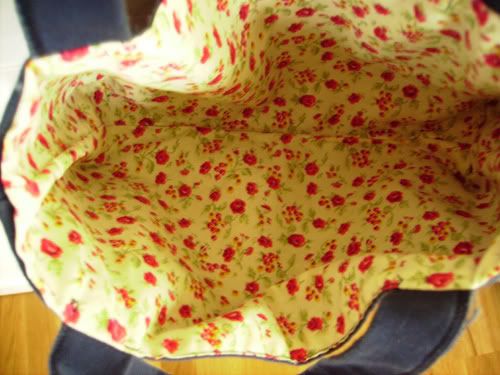
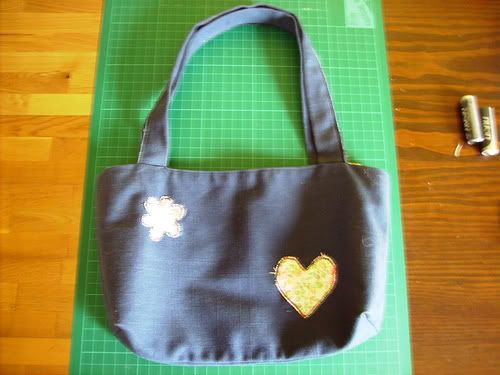
My first tote
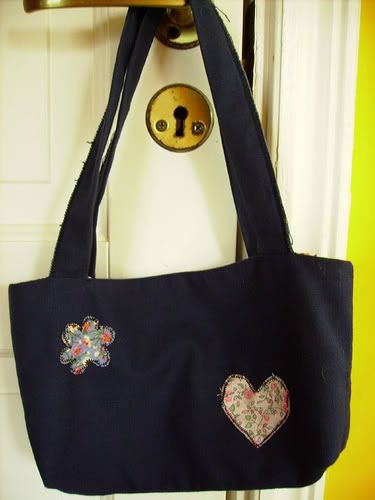
This one I made actually already a few months ago. I think it's quite cute and small. Although it should have a zip on the top so things don't fall out.
Sunday, February 11, 2007
Tutorial - Pink Cargo Pocket Diaper Bag finally finished!

After about working on it for 2 weeks my latest bag (and only 3rd total) is finished. I am so proud and really love it.

Outside I used strong light pink cotton fabric and inside a lighter cotton fabric with pink pattern.
All together it has 8 pockets. 4 cargo (accordion pockets) on the outside and 4 regular pockets (but all 8 with flaps). The most work were the cargo/accordion pockets. Firstly because I had to figure out how to sew it from the pattern and secondly everything new takes a lot of practice.
 I like the detail on the cargo pocket with the little lining rim around it.
Here is a small tutorial how to make that kind of bag:
(There might be simpler/different ways to do that kind of bag. If you know any other ways, or have some other remarks, just leave a comment at the end of this entry.)
First think of all the pieces you need:
1 Top piece: 20x36 cm (7.9x14.2 in)
1 Bottom piece: 34x11 cm (13.4x4.3 in)
2 Sides: 21x11cm (8.3x4.3 in)
2 Front/Back: 34(bottom)x40(top)x21(sides)cm - (13.4x15.7x8.3 in) you can see the shape of it on the picture
4 small Flaps: 9x8 cm rectangle (3.5x3.1 in) - cut off corners to the shape you want
4 big Flaps: 13.3x8 cm (5.2x3.1 in) (same as with small flaps)
2 small regular Pockets: 9x15 cm (3.5x5.9 in)
2 big regular Pockets: 13.3x15 cm (5.2x5.9 in)
2 small accordion Pockets: have a look at the information (link) below.
2 big accordion Pockets: same have a look at link below.
1 Zipper: 34 cm (13.4 in)
2 Straps: 100x4cm (39.4x1.6 in) (seam allowance 0.5cm (0.2 in) each side, so you end up with 3cm (1.2 in) finished width)
Velcro for the pockets to close

the top piece is missing from the picture because I originally planned the bag differently. Also, you can see the accordion pockets cut out from the lining material - you don't line them, just sew on a facing piece as described in the link. At least you can imagine how the cut out accordion pocket looks like.
-----all these from Fabric and Lining except that the accordion pockets don't need lining but just a facing piece the same length the pocket is. More on accordion pockets: Look up here:
http://www.diynetwork.com/diy/cda/article_print/1,1983,DIY_14144_2277019_ARTICLE-DETAIL-PRINT,00.html
- I made for almost all of these templates from carton (so next time I plan to do this bag I have it already ready). Then don't forget to add seam allowance. I took 1.5cm (0.6 in) for mine. Then cut them all out.
- Sew all the flaps together. Take the inside part of the flap (lining) and sew onto the right side the male Velcro patch. Then Fabric and Lining - right side to right side - leave the top side open for turning - turn and sew the last side.
- Sew the inside pockets. I lined each of the inside pockets. (Fabric/Lining - So there is a contrast between the lining of the bag and the pockets.) Sew as point 2: put together right sides, sew 3 sides, turn inside out and sew last side. Don't forget to sew onto the right spot (measure according the flap Velcro) the female Velcro patch. This picture shows a double pocket. (Just a little gimmick.)
- Take the lining front/back piece decide where exactly you want the big pockets you just sewed in 3 and pin/sew. Attach the flap: lay it so that lining of bag and outside of flap are together and sew. (I mean don't sew the flap in closed position on the pocket, this way looks much nicer and you don't see any stitches when the flap is down.)
- Repeat for smaller side pieces.
- Now put the lining bag together: Start with the bottom piece and attach the front, back and both sides. Take care to sew exactly on the lines to keep it accurate. Then sew sides to front/back until you end up with a nice inside bag.
- Now comes the most tricky part - to sew the accordion pockets. First prepare the facing: Turn top/bottom of it 0.5cm and sew. Attach the strip right side to right side of pocket. (Left side is up.) Bend it over to left side and pin down and sew. Now you have this nice rim. Pin together the corners of the pocket. The left side (writing and drawing) is outside and sew on the line the corner. Repeat for the other side. Bend and sew all 6 vertical lines almost up to the corner. This also on the left side. Turn inside out
- Sew the finished accordion pockets onto the fabric. I started with the bottom line and sewed almost up to the corner. You need to leave it a little bit open so you can tuck the sides nicely in. Sew the sides. Repeat with all other 3 accordion pockets. Wow! Now the hardest part is over.
- Sew the fabric pieces together as in step 6.
- For the top part, pin and sew right sides together, again along 3 sides, leave one open for turning and sew after turning the remaining one. Draw the zipper exactly how you want it onto the top part (fabric). Sew along the outside line so you have a rectangle. Cut open the inside like an arrow. Put the zipper inside between lining and fabric, turn fabric a few mm in and sew in place. ( I know it all reads easier than it is done!)
- Do the straps: Sew together right sides on 3 sides, turn inside out and sew last side. Then left and right of the strap (about 0.5cm) sew down, so the straps look nicer and hold better their shape. I did mine pretty long - about 100cm. You just have to find out how you want them to be.
- Put the inside/outside bag and straps together: Take the fabric (outside of bag): Right side inside, left side outside. Into this one you put the lining: right side outside and left side inside. Put the handles accordingly inside so that only a few cm stick out. The handles have to correspond properly. Sew along the line but leave quite a space open for turning. Turn inside out and sew the last part like this.
- Last part to sew the top into place. I started first with the sides, then did all 4 corners and at the end the front and back.
- Finished!


 just the picture of the zipper (in the finished bag)
Subscribe to:
Posts (Atom)